As stated in my post yesterday, I was going to continue working on the dome today.
"No man born with a living soul Can be working for the Clampdown"
- The Clash, "Clampdown"
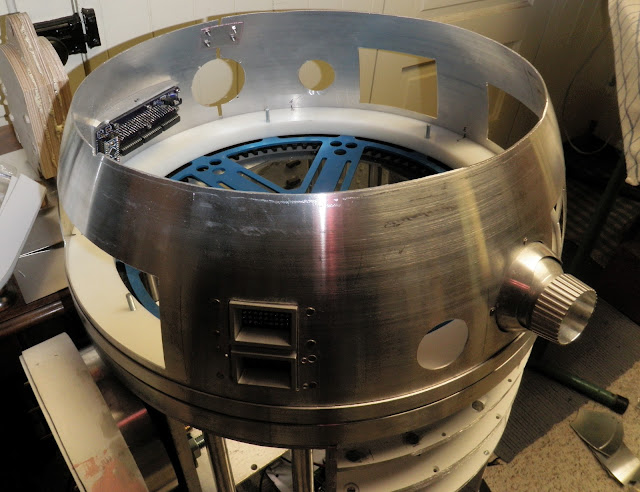
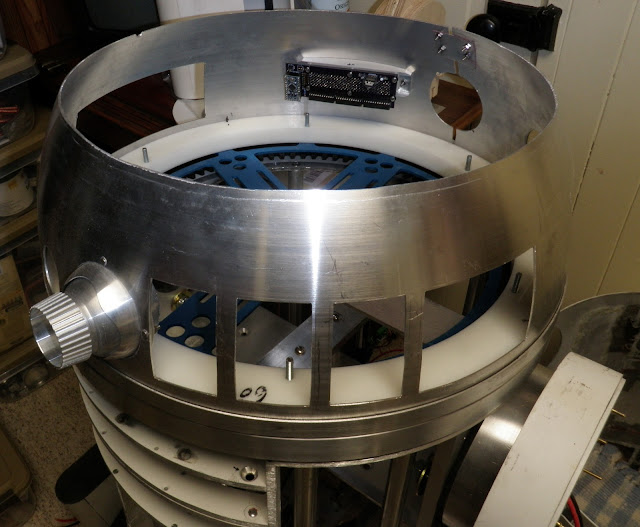
OK - so the clash has nothing to do with this build, but The Clash is one of my all time favs, and the dome got a clampdown last night. This is the top inner dome bonded to the outer dome.
Only later did I realize that I should have waited, as I plan to mount servos to actuate the pie panels on top of the dome, and these could hove been mounted through the inner dome.... before it is bonded to the outer dome.
Oh well, research before you leap. I was on such a roll Friday night, that I could not stop. I figured it was a good opportunity to let the JB Weld set overnight so I could work with the dome in the morning. I am not that worried, as the JB weld is really something else. It is a two part bonding agent will hold (according to the packaging) the very fabric of the universe together. The only problem is that once mixed, it has the consistency of peanut butter - and it is rather difficult to spread. So, lesson learned, read before you leap and many a show of tears you will keep.
I was on the fence about sanding the dome because of what a chore I have heard it can be. The spin lines from the manufacture of the dome are quite prominent, and it is a choice of the individual builder to leave them, or opt for a shiny surface. A few swipes of a sanding sponge later, I am one who will (eventually) have a shiny dome. You can see a very distinct spin line cutting across the middle of the dome. Hopefully, this process will not be as bad I have heard.... I will keep you posted.
Ultimately, the result pays for itself. Once complete, the shiny dome look is quite impressive. Below is a photo of a dome that is a LOOOOOOOONG way from complete.
With the upper dome assembly pretty much complete, it was time to mount the inner dome to the lower flange. The kit came complete with screws to mount the inner dome to the plastic ring, but they were torx drive (or star) screw heads. Not only were they torx drive, they required the smallest bit known to man. Dad and I have a good number of tools, including torx drive screwdrivers and bits. These were micro sized, and I did not feel it was worth a try to the local hardware store to get a git for these screws.
I dove into my ever-growing box of screws, bolts, nuts and fasteners, and located a blister pack of 6-32 stainless steel screws. What I actually bought these for, I haven't the slightest idea. I am sure at some point in the future, I will need 12, and only have 6 because I used them on the dome.
Below is a photo of the inner dome mounted to the plastic ring and flange. I had to take quite a bit of material off of the bottom of the inner dome in order to achieve the correct height. I tried tin snips, the jig saw, a hack saw, the Dremel cutoff wheel.... Eventually, I ended up sanding the bottom edge down with my belt sander. It took a while, and it rattled the dome to it's core. Again, hindsight is 20/20 , and I tend to get a little myopic as I am working through this. I left all of the hardware mounted as I was sanding - nuts came undone, captive studs flew across the room, and it even shot the Mini-Ardunio form the rear logic display under the workbench. To save some sense of pride, I will call this a stress test, putting the dome through rigors that it would not see in 1,000 lifetimes.
Once the screws were in place, I used a Dremel metal cutoff wheel to grind down the heads of the screws, as I don't see the need to remove this part anytime soon.
There is a strip in between the flange and outer dome. This strip covers up the screws that mount the dome to the lazy susan. Eventually this center strip gets a coat of blue paint.
Fortunately, I WAS thinking ahead before I mounted the dome to the flange. The dome plate is designed to mount lifters for the various goodies that come out of R2's noggin. These branches need to be centered on the openings of the pie panels.
A little off the top, please. Sheesh - it may look like a disaster, but this is only the inner dome. I honestly don't know how I did it, but the bolts that come up from the lazy susan bearing could have easily interfered with any number of things on the inside of the dome. Two sets of logic displays, two PSI's, two holo-projectors - and I managed to MISS them all. This was just dumb luck that it turned out this way, and if it weren't for dumb luck, I wouldn't have a brain at all. (Or something like that)
Similar shot, different angle.
Happy as I was with my progress, one of the things that makes R2 recognizable is his Center "Radar Eye". This is an interesting piece, as the inside of it follows the curve of the dome, so the mounting bolts are anything but straight. I marked the holes for drilling and got to task.
... And you can see that I did not hit my mark as expected. I had to do the same thing on the fiberglass dome, so I was neither surprised or worried about the ugliness of the holes. They will be covered with the eye anyways. Nobody will see the crappy drill and Dremel work. Except for those who are still reading this post....
Ahhhh.. yes, I do believe that is about right. Eventually, I want to pick one of these radar eyes up in aluminum, but they are extremely difficult to come by.
Next up the PSI spacers. PSI = Processor Status Indicator for all you Nerds out there. Actually, I had to look it up. Not saying I am not a Nerd and all.... I just build R2 units while waiting for the Super Bowl to air.
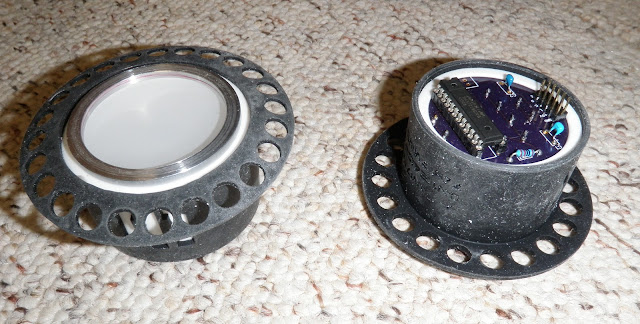
In the lower left, all of the various pieces/parts are shown. The pieces fit together like a fine lasagna, and on the right you see the complete unit. All of these pieces are made from some form of silicone, nice and flexy. The flange will mount the unit to the inner dome.
"But you grow up and you calm down"... another Clash quote, from the same song as before no less - sorry. One assembled up and the other down.
Bonded to the dome with some JB Weld. JB Weld Quick to be exact. This stuff sets up in about 5 minutes, so no time for dawdling while working with this stuff.
The front PSI mounted in a similar fashion. The flange needed to be cut down because this one is mounted lower on the dome, and the Holo-Projector is right next to it.
Amazingly, I did not need to use the wiring reference to get the Dome lighting kit hooked back up. The length of the wires pretty much dictated which bundle goes where. I am just happy tat I did not flit the wire harnesses from one board to another. I could just imagine powering this up and... pffffft - POOF ! No more blinky, blinky for you, Mr. R2 guy.
A little closer look at the wiring harnesses. Eventually, I will run the wires along the inside of the dome, securing them with silicone.
So - what does it look like in action ??!??!? In order to keep my blog followers happy, I offer another tasty video of my progress.
(And I just noticed that I have the PSI light on the wrong side. The Blue/Red should be in front, and the Green/Yellow should be in back - this will be remedied next week. Apologies for my Nerd-Fail.)
Oh yeah - I got a little paint on the little guy as well. I could have spent the next 4 hours painting away, but I have to save some work for next weekend.
One of the paint methods is to use Mazda touch-up paint. This particular color is from the RX8 - 2008 I believe, and it is a really nice match for R2's blue. For a lark, I tried this on my power couplers. This paint is extremely difficult to brush on. Ultimately, If I am going to continue with this stuff, I will load up my airbrush and use this paint in it. It was the end of the day, so I did not feel like breaking into all of that setup and cleanup. The results, not horrible, but not anything to write home about. I have a little clean-up to do, but these will certainly pass.
Leaving you with a shot of where he stands at this time. Until next time - thank you for reading me up !


No comments:
Post a Comment