The periscope lighting drama continued for a bit today. Everything worked after a week off... miracle of miracles. Apparently my soldering skills are not as bad as I thought. In the meantime, I picked up some super thin solder and some flux. Hey, what do you know - that makes a HUGE difference.
For the son of a man who dealt with flux all his career - unfortunately, not much rubbed off in this arena. If you plan to do some soldering on the electronic parts, flux and thin solder is essential. Here endeth the lesson.
Here are a couple of shots of the periscope with the omnipresent blue tape to hold on something that needs holding on. Like other parts, this thing is a work of art. It never ceases to amaze me - the many talents of members in this group are limitless.
A View from the front. The Pie panel on top is all wonky-jabbered - something that will be fixed once it finds a permanent home inside the dome.
And.... here it is all lit up ! This thing is incredibly bright. This photo is also shot before I did a bit of work isolating the center lights from the side and top lights. The center lights are so bright, they completely wash out the top tracer lights.
Here is a video of the light kit in action, cycling through it's various modes of operation. The video on camera is completely blown out by the luminous goodies emitted from the periscope.
I wanted to mount three voltage meters on R2 somewhere. One to measure total system voltage of 24 volts, and two others to monitor the 12 volt and 5 volt supplies.
LOTS of wiring involved for these lights. All of the power leads have Anderson Powerpole quick disconnects in car I need to remove the front skin for maintenance.
Everything hooked up and ready to go !
Oddly, I watched a series of Mythbusters outtakes about an hour before hooking this all up, and Adam Savage was shown mucking up something electrical. He said"....Ahhhhh, and I have produced the blue smoke !!!!! The problem with the blue smoke is that after it happens, electronics stop working"
This has happened twice to me in the past two weeks..... Once while trying to hook up an ammeter. Who knew they went inline with the power lead, and not connected to positive and negative leads (as shown on the back of the meter with little pictures). "The Blue Smoke" experience #1. You have never seen an old fart like me move so fast to shut the power off.
"The Blue Smoke" experience #2 happened when I got the front skins all wired up. The really nice thing about the Anderson Powerpole connectors is that they are color coded. Color coded so you hook up green to green, orange to orange, etc, etc.... Sounds simple, right ? When I powered the unit up to test the voltmeters, POOOOOOFFFFF !!!!!! Fast action ensued to switch the main power off. I figured I somehow fried one of the new the voltmeters. Nope, I had the power to the PBI and Logic board switched ! D'OH. Face meet palm. There it was, I had connected the green powerpole to the yellow and vice versa. Fortunately, the electronics still worked after I hooked the unit up in the proper manner. Bullet dodged. I immediately went and picked up one of Kaden's books to re-learn my colors.
Closeup of the volt meters. I really wanted to have three colors, but they only made two colors in this particular unit. Who knows, I may swap out the red meter for another blue someday.
Steady rocking, showing 5 volts, 12.6 volts and 24.6 volts. Function factor = 0, cool factor = at least 87 or 88.
A little wider shot of the lights and such.
Here is a video of Kaden rocking a new skill. When we first showed him the lights, he took 3 steps back and shook his head, saying, "No, No, NOOOO !" I believe it scared him to the point of filling his Huggies.
Ten minutes later, with the camera on, he is proud to show off his new skilz !
And yes, Kaden calls him Too-Too. Just when I get my parents to call him R2..... I fear he will forever be known as "Too-Too". Who knows, maybe Disney will pick us up for a new series called "Dott and Too-Too".
A view from the center vent to the internals. Eventually, I plan to clean up the routing of the wires. As of now, it is all about getting the things to work. Pretty is not in the equation, that will come later.
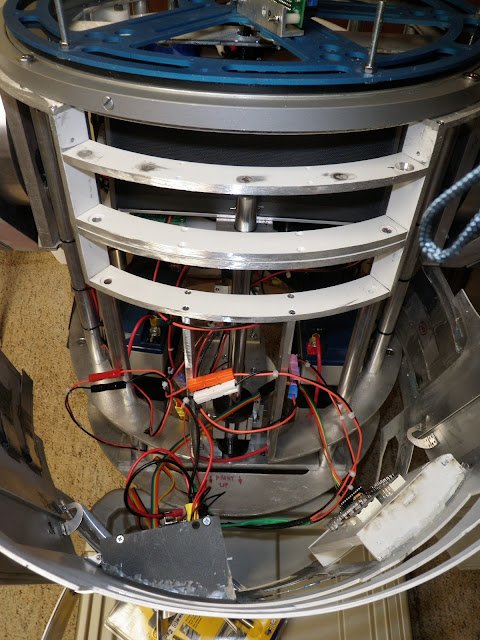
A view from the top. Believe it or not, I still have a very good idea about what each and every one of these wires feeds and serves.
R2 had a constant buzz coming from the speaker when he was not "talking". After a little research on the Astromech boards, I installed a ground loop isolator on the audio output for the Bose speaker. Works like a charm. Think of the sound that may result from engine noise in some car stereos. The speaker is absolutely silent until a signal is sent from the iPod via bluetooth.
I have very exciting news about some parts I acquired this past week. They will be featured in upcoming posts - stay tuned !!!!!


No comments:
Post a Comment